Plivo SIP Integration Guide — QCall SIP Dialer (Inbound + Outbound)
This guide walks a customer through connecting a Plivo SIP trunk to QCall so their AI agent can place outbound calls and receive inbound calls on a real phone number. It has two halves:- Part A — Plivo side: buy a number, create an Outbound Trunk, generate SIP credentials, and get the values QCall needs.
- Part B — QCall side: add the SIP Dialer in the QCall dashboard, then finish the inbound loop-back on Plivo.
You need one thing from each side. Plivo gives you a SIP termination domain + username + password + phone number. QCall gives you back a SIP URI that Plivo must forward inbound calls to. That two-way handshake is the whole integration.
How it works (architecture)
- Outbound = QCall → Plivo. From QCall’s point of view, Plivo is where the call terminates into the phone network. That is why QCall calls it the SIP Termination URI.
- Inbound = Plivo → QCall. Plivo must be told to originate the incoming call toward QCall’s SIP address (set as the Plivo Inbound Trunk Primary URI).
Credential cheat-sheet (Plivo → QCall field mapping)
Fill this in as you go through Part A. You’ll paste the right-hand column into the QCall dashboard in Part B.
Then, after saving in QCall, you receive one value to bring back to Plivo:
The exact SIP URI is shown on your dialer’s SIP configuration in the QCall dashboard (it is workspace-specific). Use that value — do not copy the example above.
Part A — Plivo: get your SIP credentials & number
Step 1 — Create your Plivo account
- Sign up at https://cx.plivo.com (new accounts get free trial credit).
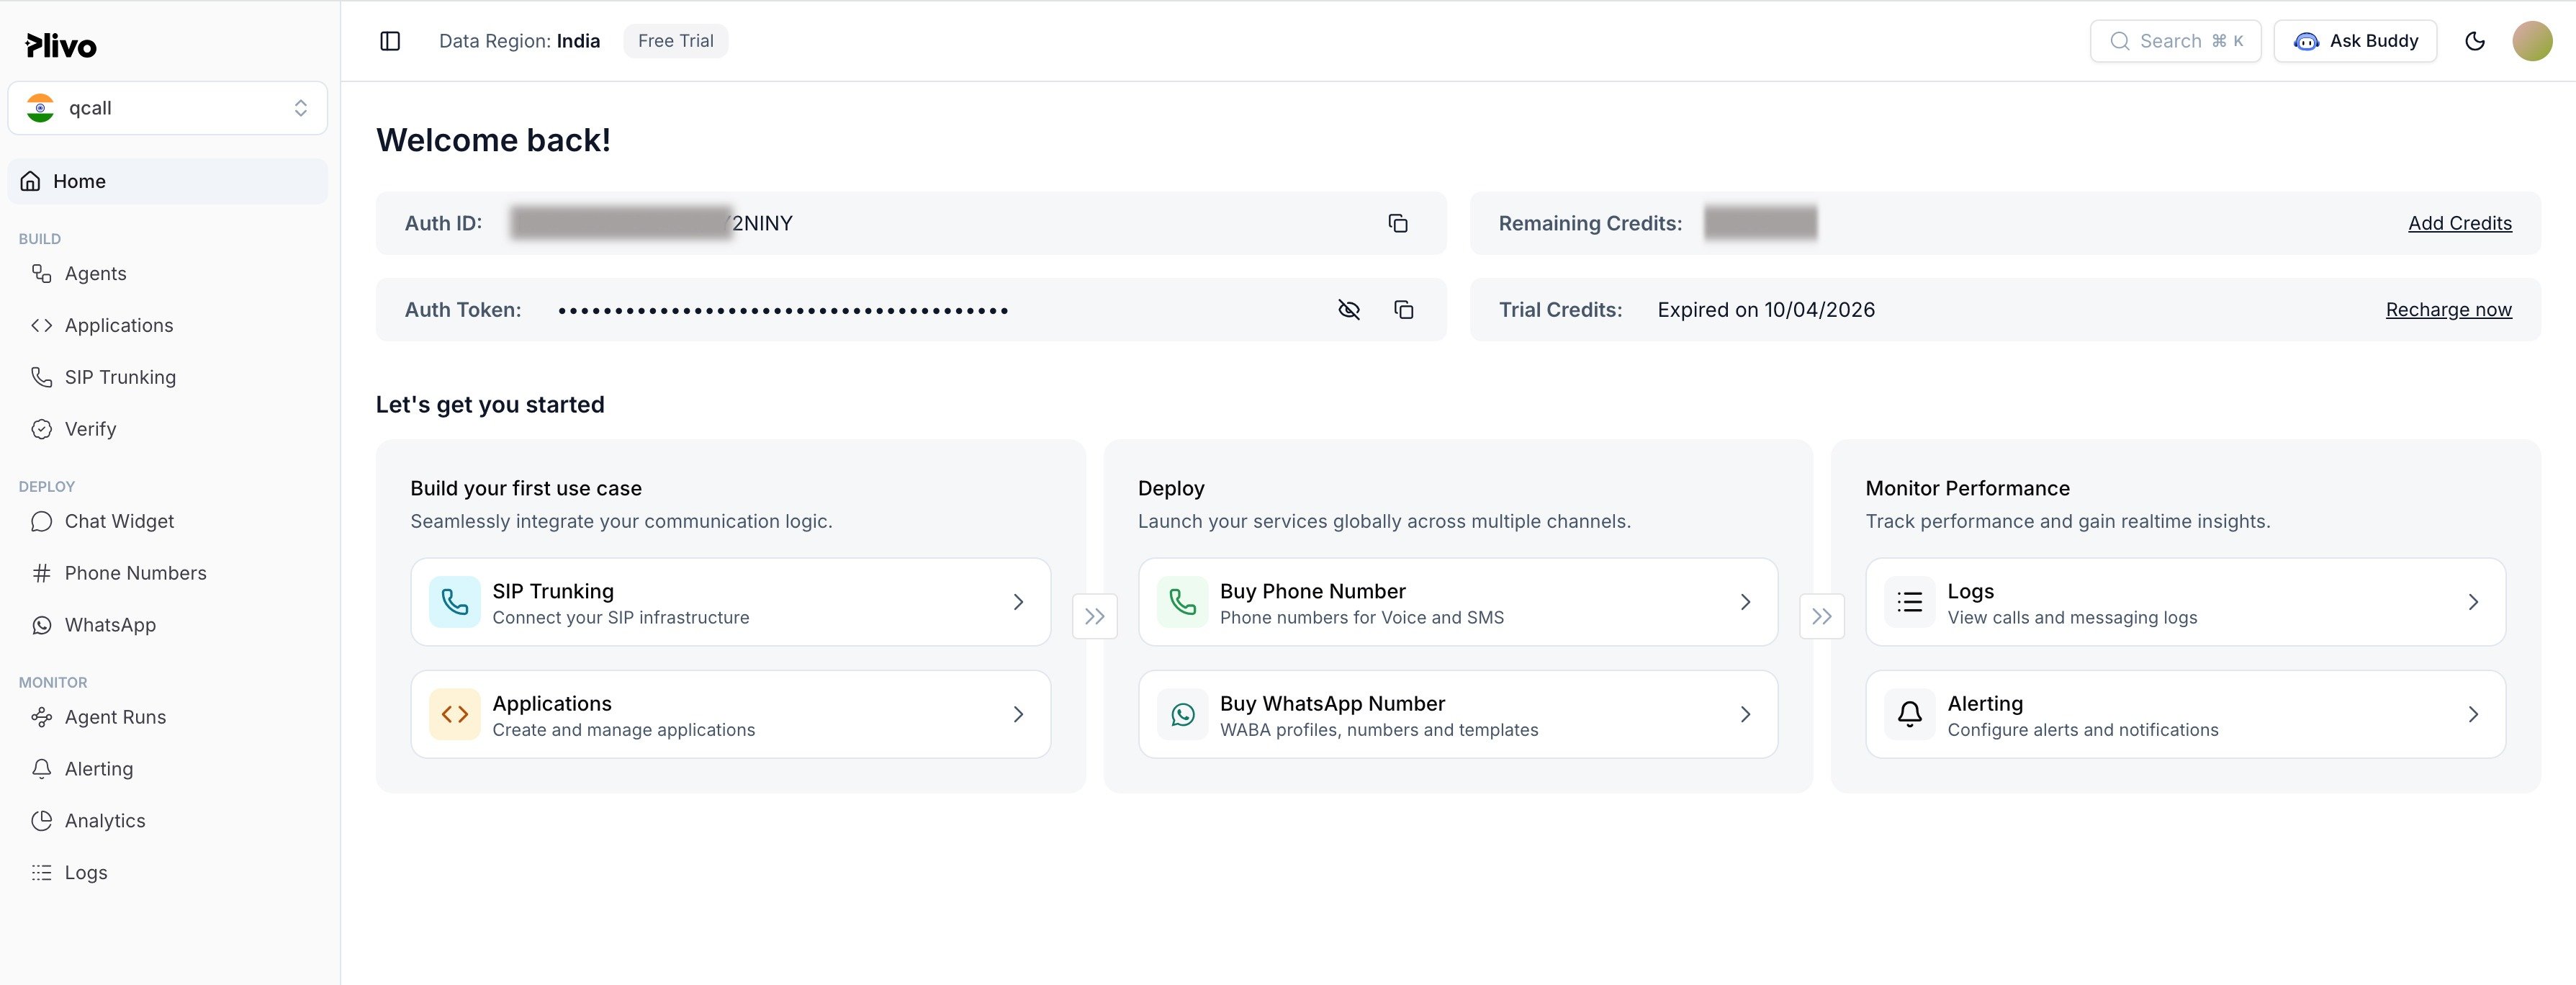
- After login, open the dashboard. Plivo’s SIP trunking product is called Zentrunk — you’ll find it under SIP Trunking in the sidebar. Note your account-level Auth ID and Auth Token (these authenticate Plivo API calls; you do not paste them into QCall).
Step 2 — Buy a phone number (DID)
- In the Plivo console, go to Phone Numbers → Buy New Number.
- Filter by Country, Prefix, Type, and set Capability to Voice (inbound + outbound).
- Search, pick a number, and click Buy Number. This number is your caller ID for outbound and your ring-in number for inbound.
- Record it in E.164 format with the
+and country code — e.g.+12025550147. → This becomes the Phone Number field in QCall.
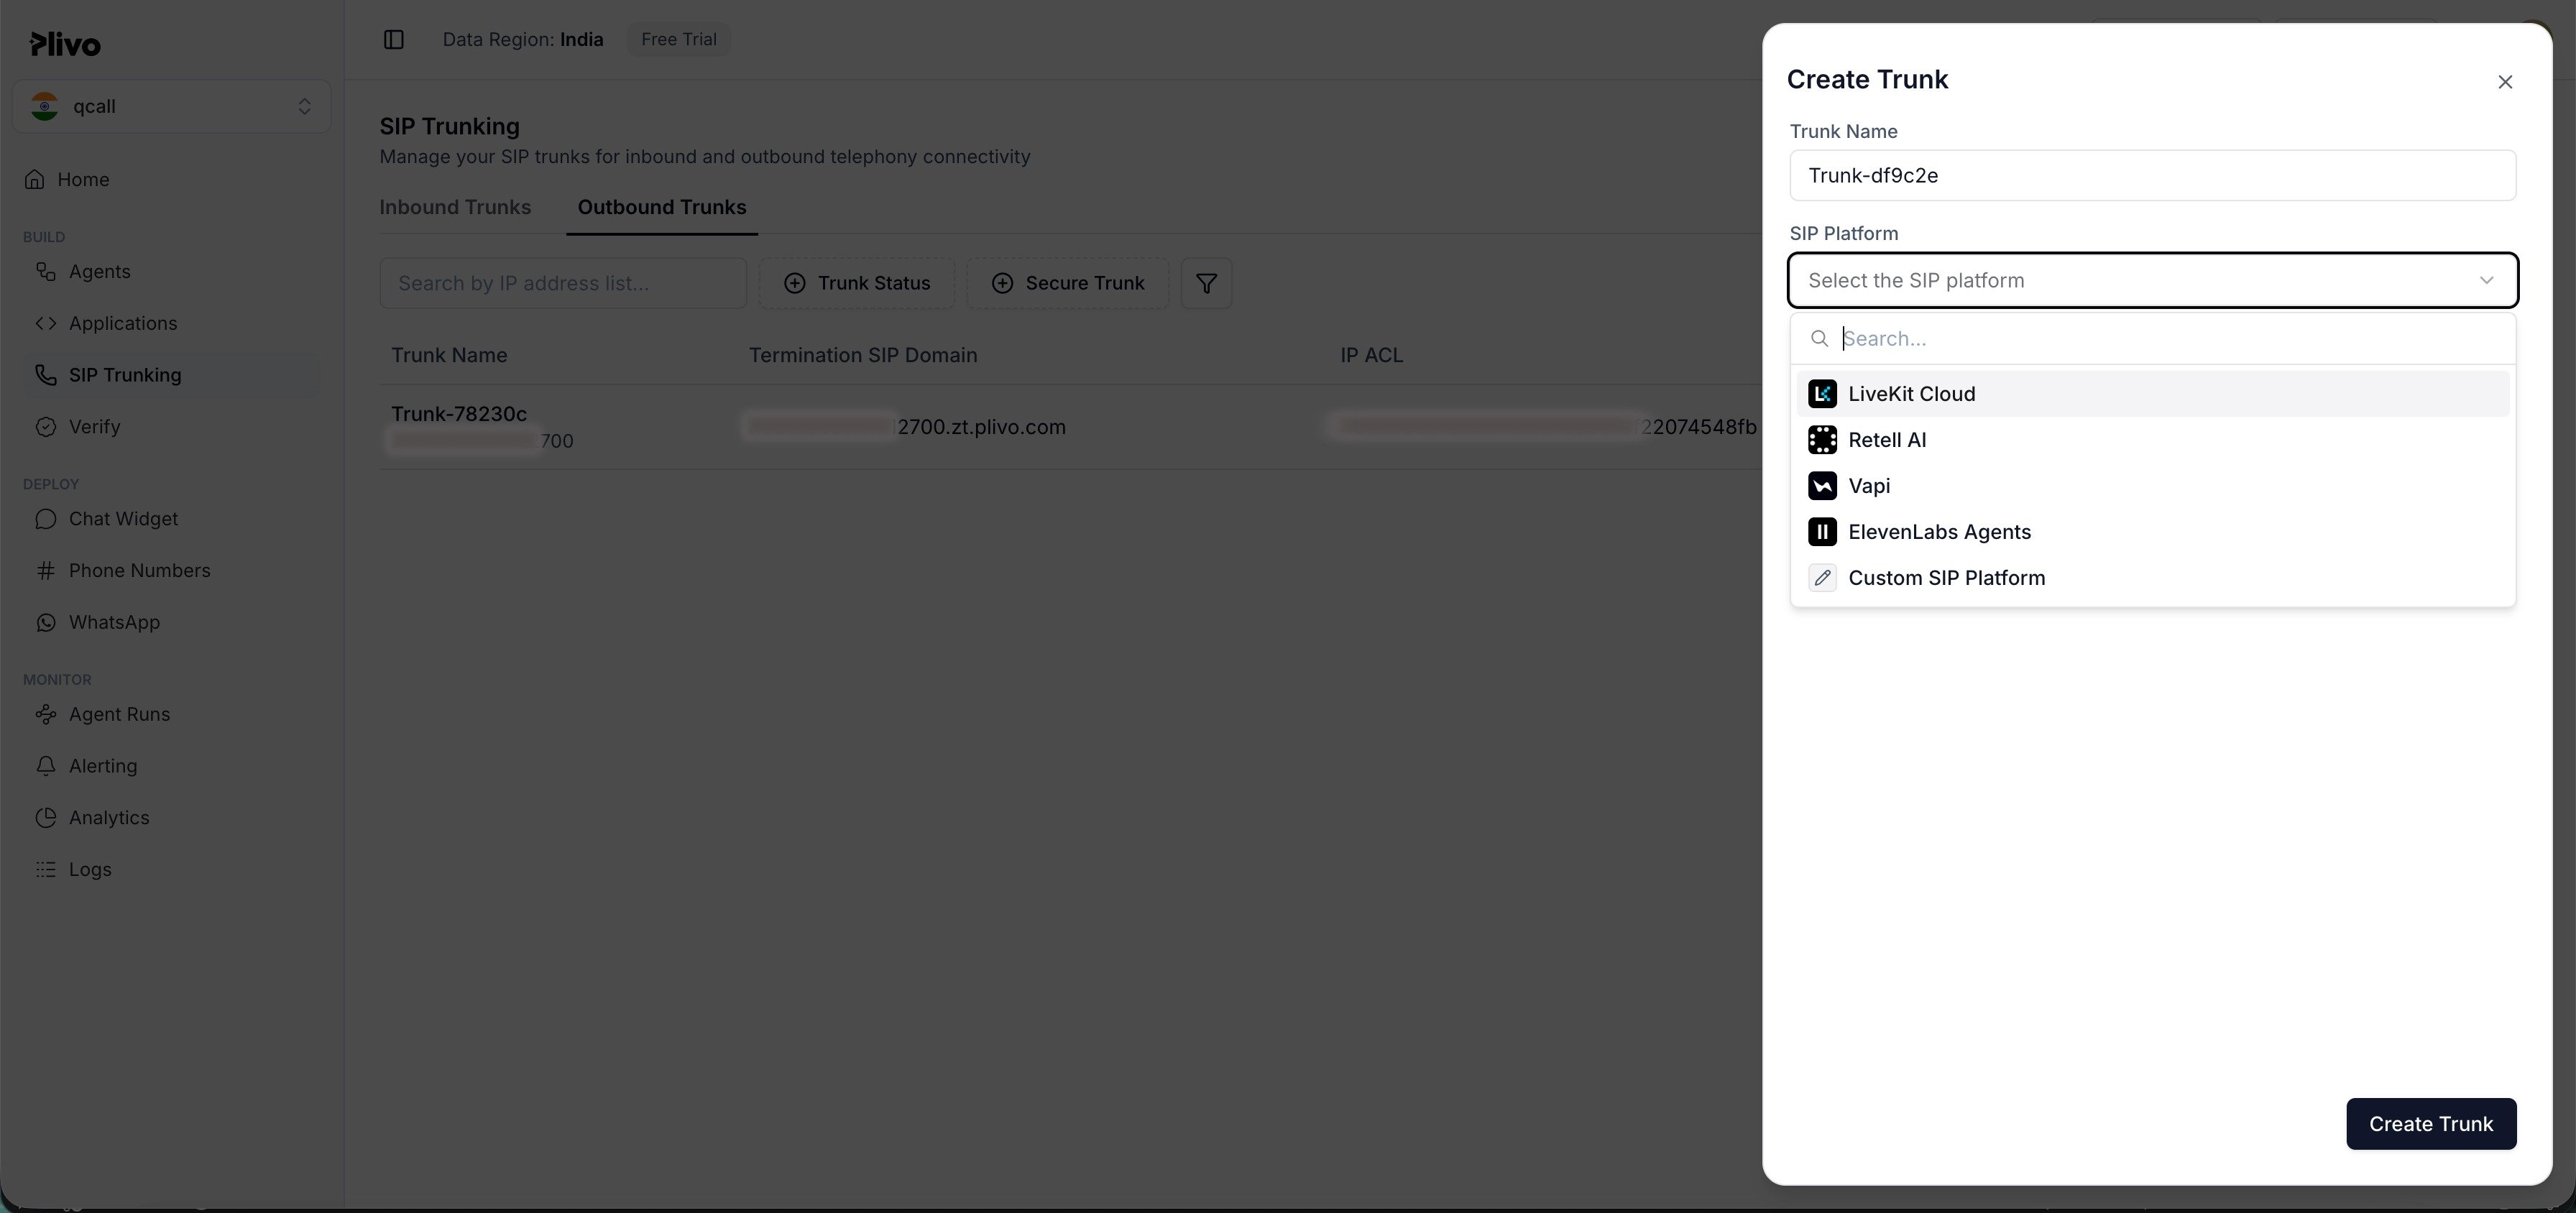
Step 3 — Create an Outbound Trunk
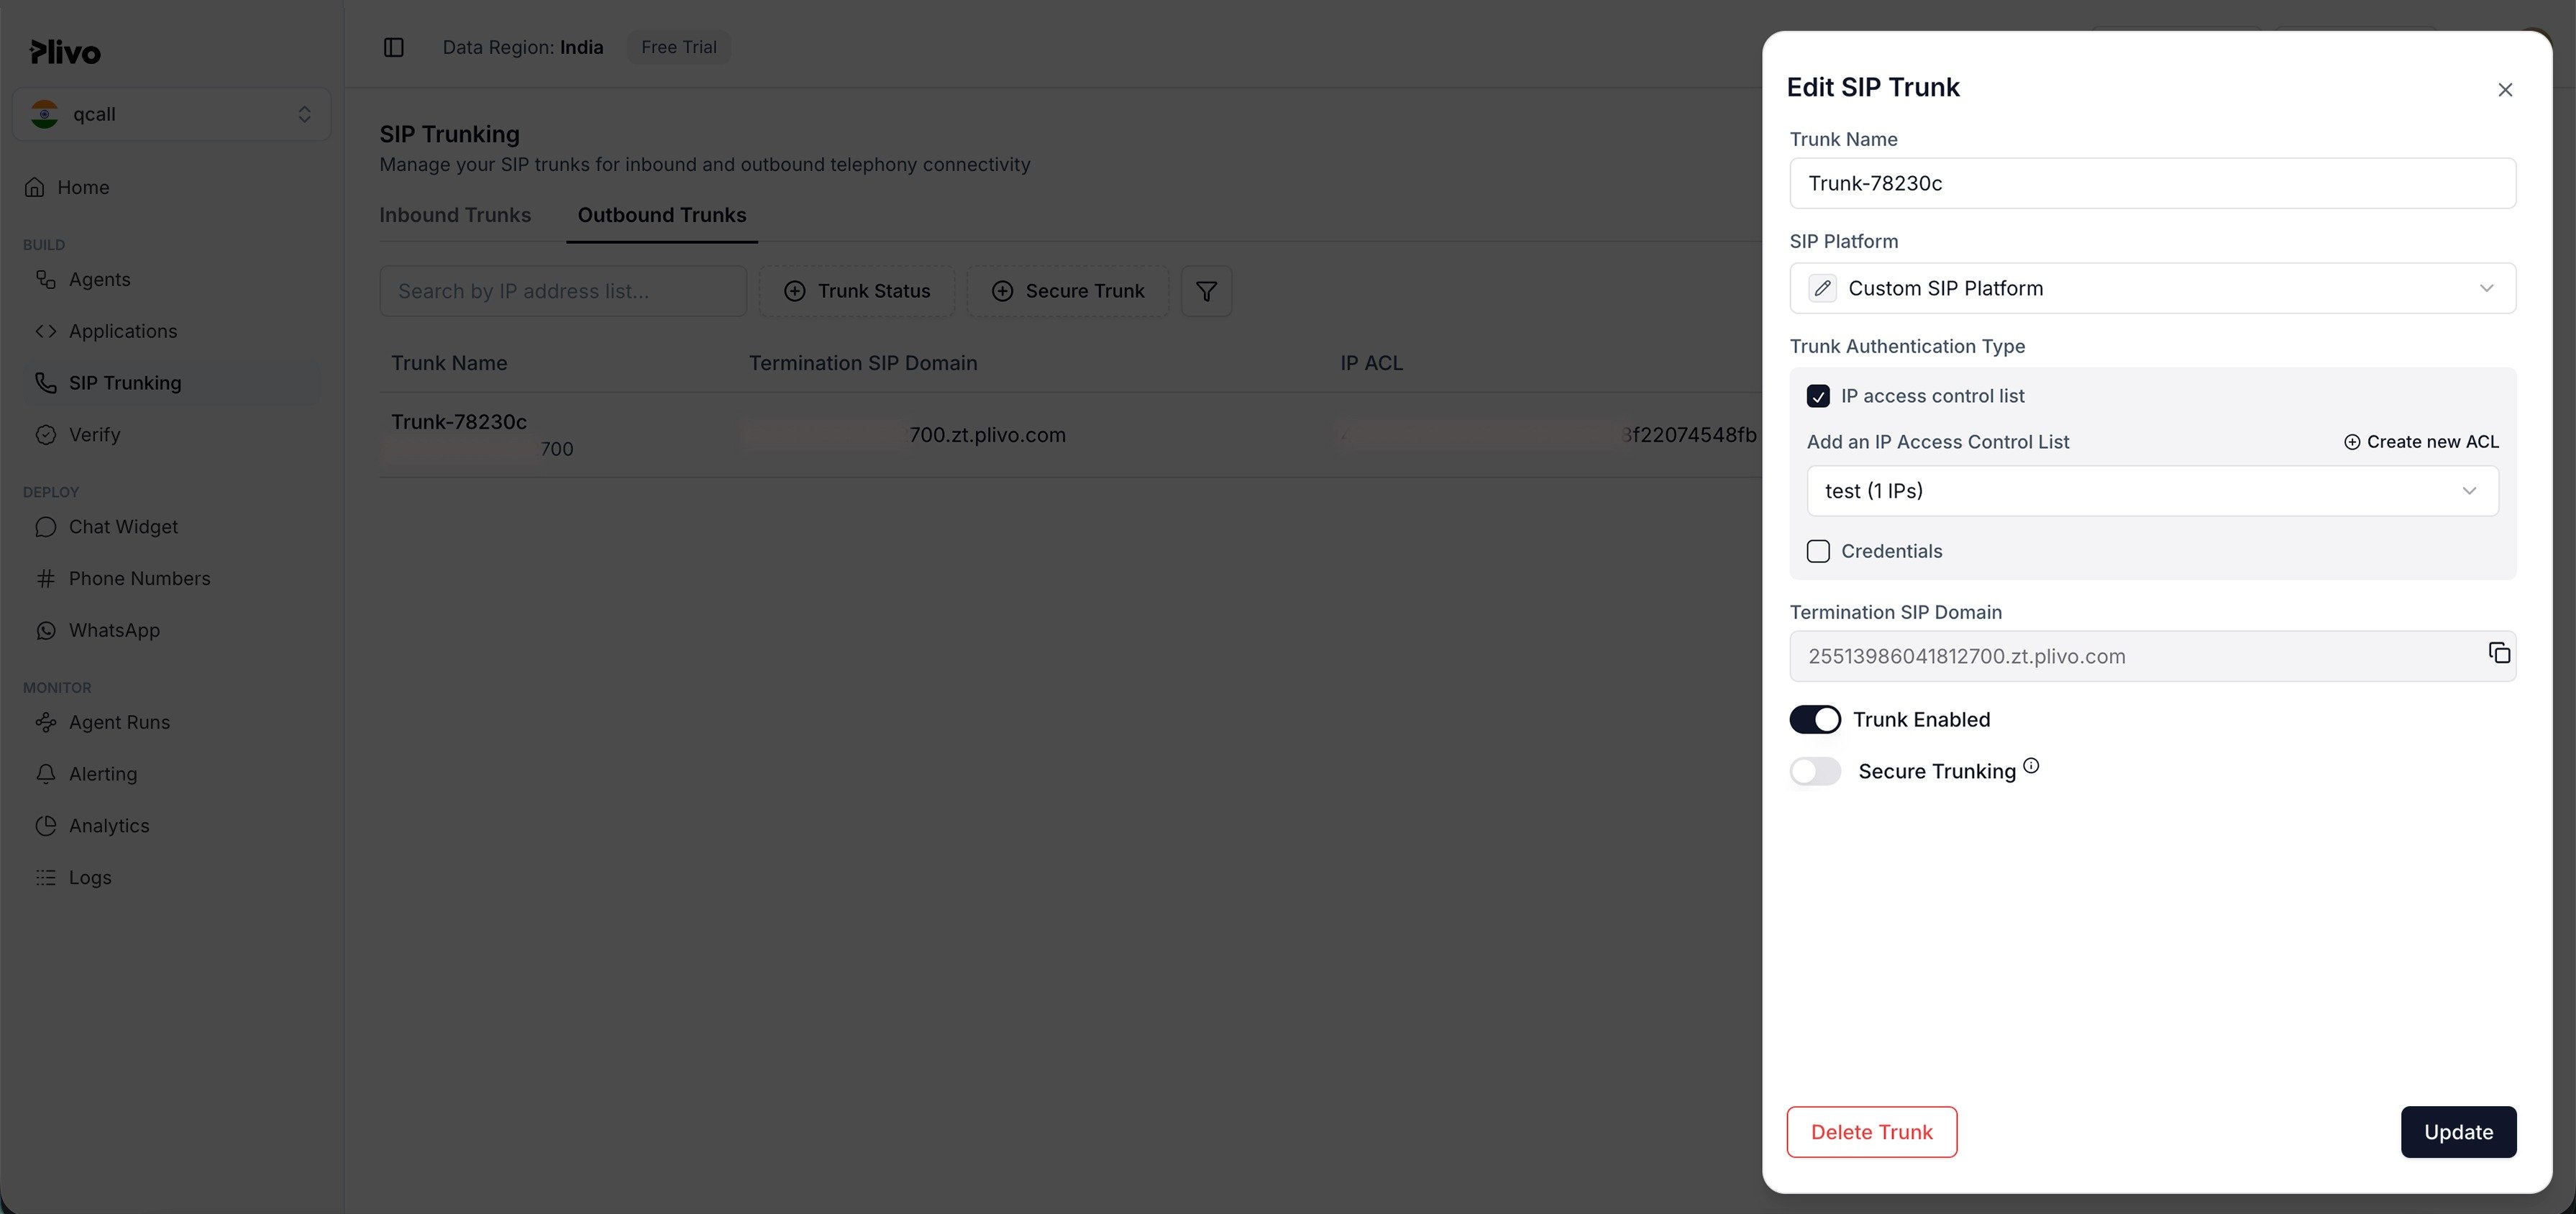
The Outbound Trunk is what QCall sends outbound calls into — it is the source of your SIP Termination URI.- Go to SIP Trunking → Outbound Trunks and click Create New Outbound Trunk.
- Under Trunk Details, enter a name (e.g.
qcall-outbound). - For Trunk Authentication, choose Credentials List (QCall authenticates with username/password, not IP). Create the credentials in Step 4.
- (Optional) Leave Secure Trunking off to start — you can enable TLS/SRTP later.
- On save, Plivo provisions a unique termination SIP domain in the form
{trunk_id}.zt.plivo.com(e.g.21784177241578.zt.plivo.com). → This becomes the SIP Termination URI in QCall.
Step 4 — Create SIP credentials (username + password)
- From the Outbound Trunk → Trunk Authentication → Credentials List → + Add New Credentials List.
- Enter an Auth Group name (e.g.
qcall-creds), a username, and a password.- Username: 5–20 alphanumeric characters (e.g.
qcallprod). - Password: 5–20 characters, alphanumeric plus
~!@#$%^&*()_+, including at least one special character.
- Username: 5–20 alphanumeric characters (e.g.
- Copy the password now and store it securely — Plivo stores it hashed and you’ll re-enter it in QCall. If you lose it, create a new credential.
- Back on the Outbound Trunk, select this credential group in the Authentication dropdown and save. → Username + password become SIP Username and SIP Password in QCall.
QCall authenticates with username/password (digest auth), so the Credentials List is required. You do not need to set up an IP Access Control List or know LiveKit’s egress IPs.
Step 5 — Create an Inbound Trunk & attach your DID
Numbers can only be linked to Inbound Trunks, so create one now and attach the number you bought in Step 2. (You’ll set its Primary URI later in Part C, once QCall gives you the SIP URI.)- Go to SIP Trunking → Inbound Trunks and click Create New Inbound Trunk.
- Enter a name (e.g.
qcall-inbound). - Leave Primary URI empty for now — you’ll fill it in Part C.
- Under Link Numbers, select the DID from Step 2 and save.
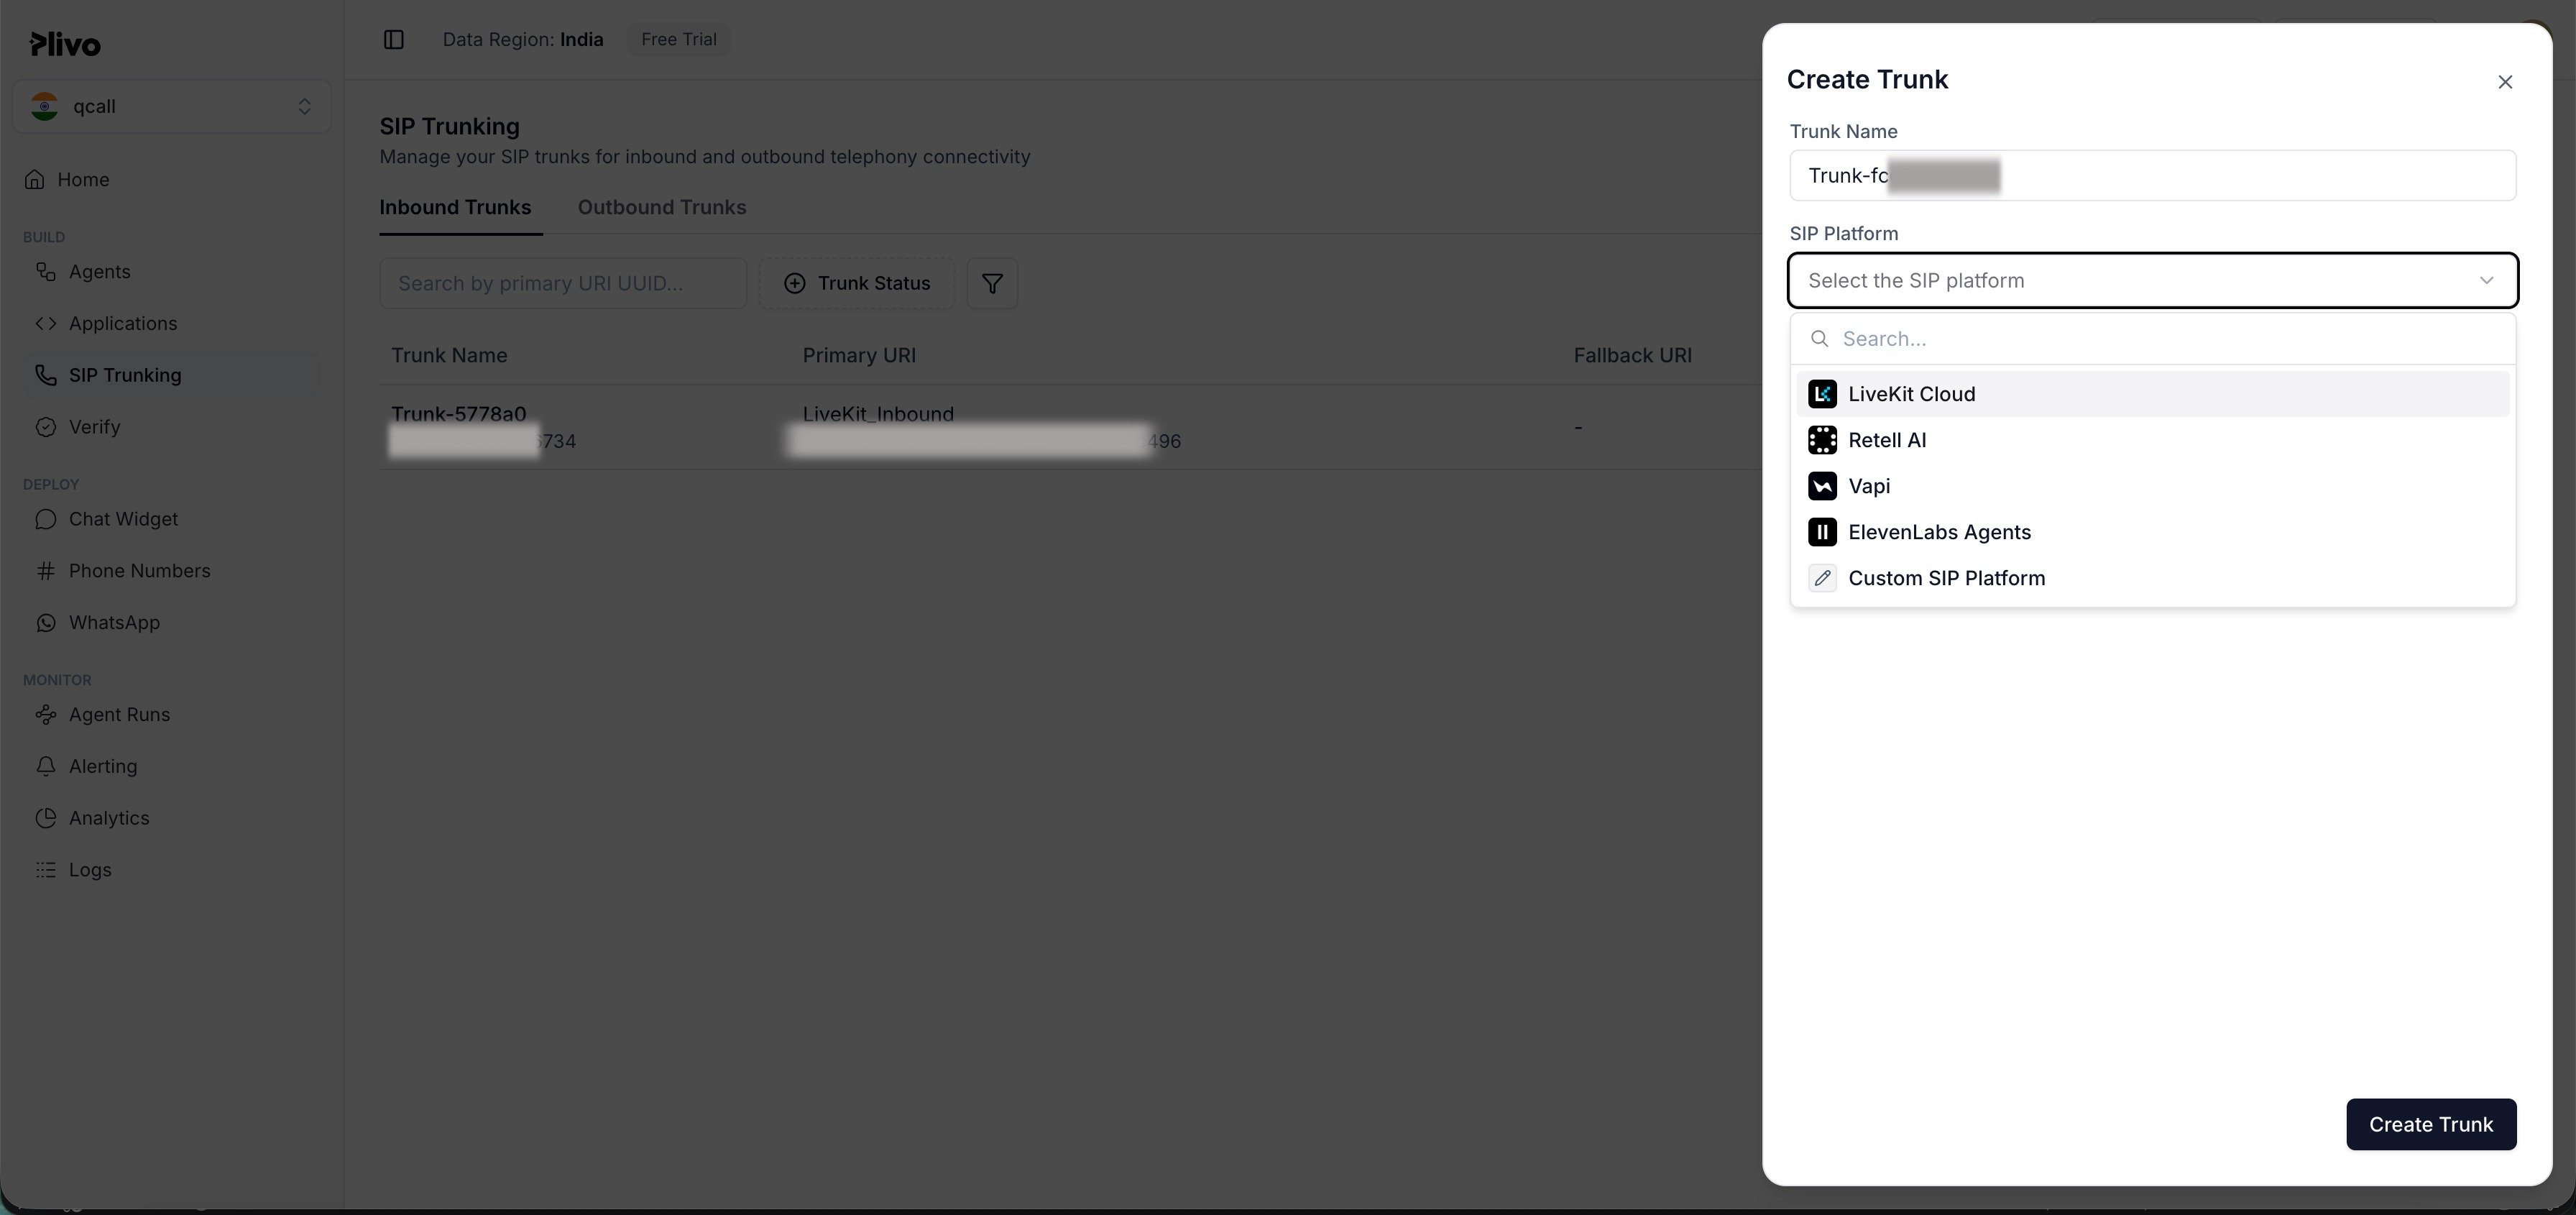
Alternatively, from Phone Numbers → Purchased Numbers, open your number, set Application Type to SIP Trunk, choose the inbound trunk, and Save changes.✅ At this point you should have all four values for the cheat-sheet: termination SIP domain, username, password, and DID number.
Part B — QCall dashboard: add the SIP Dialer
This is what a customer actually clicks in the QCall app.- Log in to the QCall dashboard.
- Go to Settings → Dialers (the “Dialers” / “Phone Numbers” area).
- Click ➕ Add Dialer and choose SIP as the dialer type.
-
Fill in the form using your cheat-sheet:
- Click Create / Save.
- Creates a outbound trunk → sends outbound calls to your Plivo termination domain, authenticated with your username/password, using your DID as caller ID.
- Creates a inbound trunk → matched to your DID number.
- Creates a dispatch rule → routes incoming calls on that number to your AI agent.
178.212.35.170:5060). Copy it — you need it for Part C.
If you don’t see the SIP URI in the UI, it’s a fixed value for your QCall workspace — ask QCall support and they’ll provide your SIP domain.
Part C — Plivo: finish the inbound loop-back
Inbound calls only reach your AI agent once Plivo knows where to forward them.- Return to the Plivo console → SIP Trunking → Inbound Trunks → open the inbound trunk from Step 5.
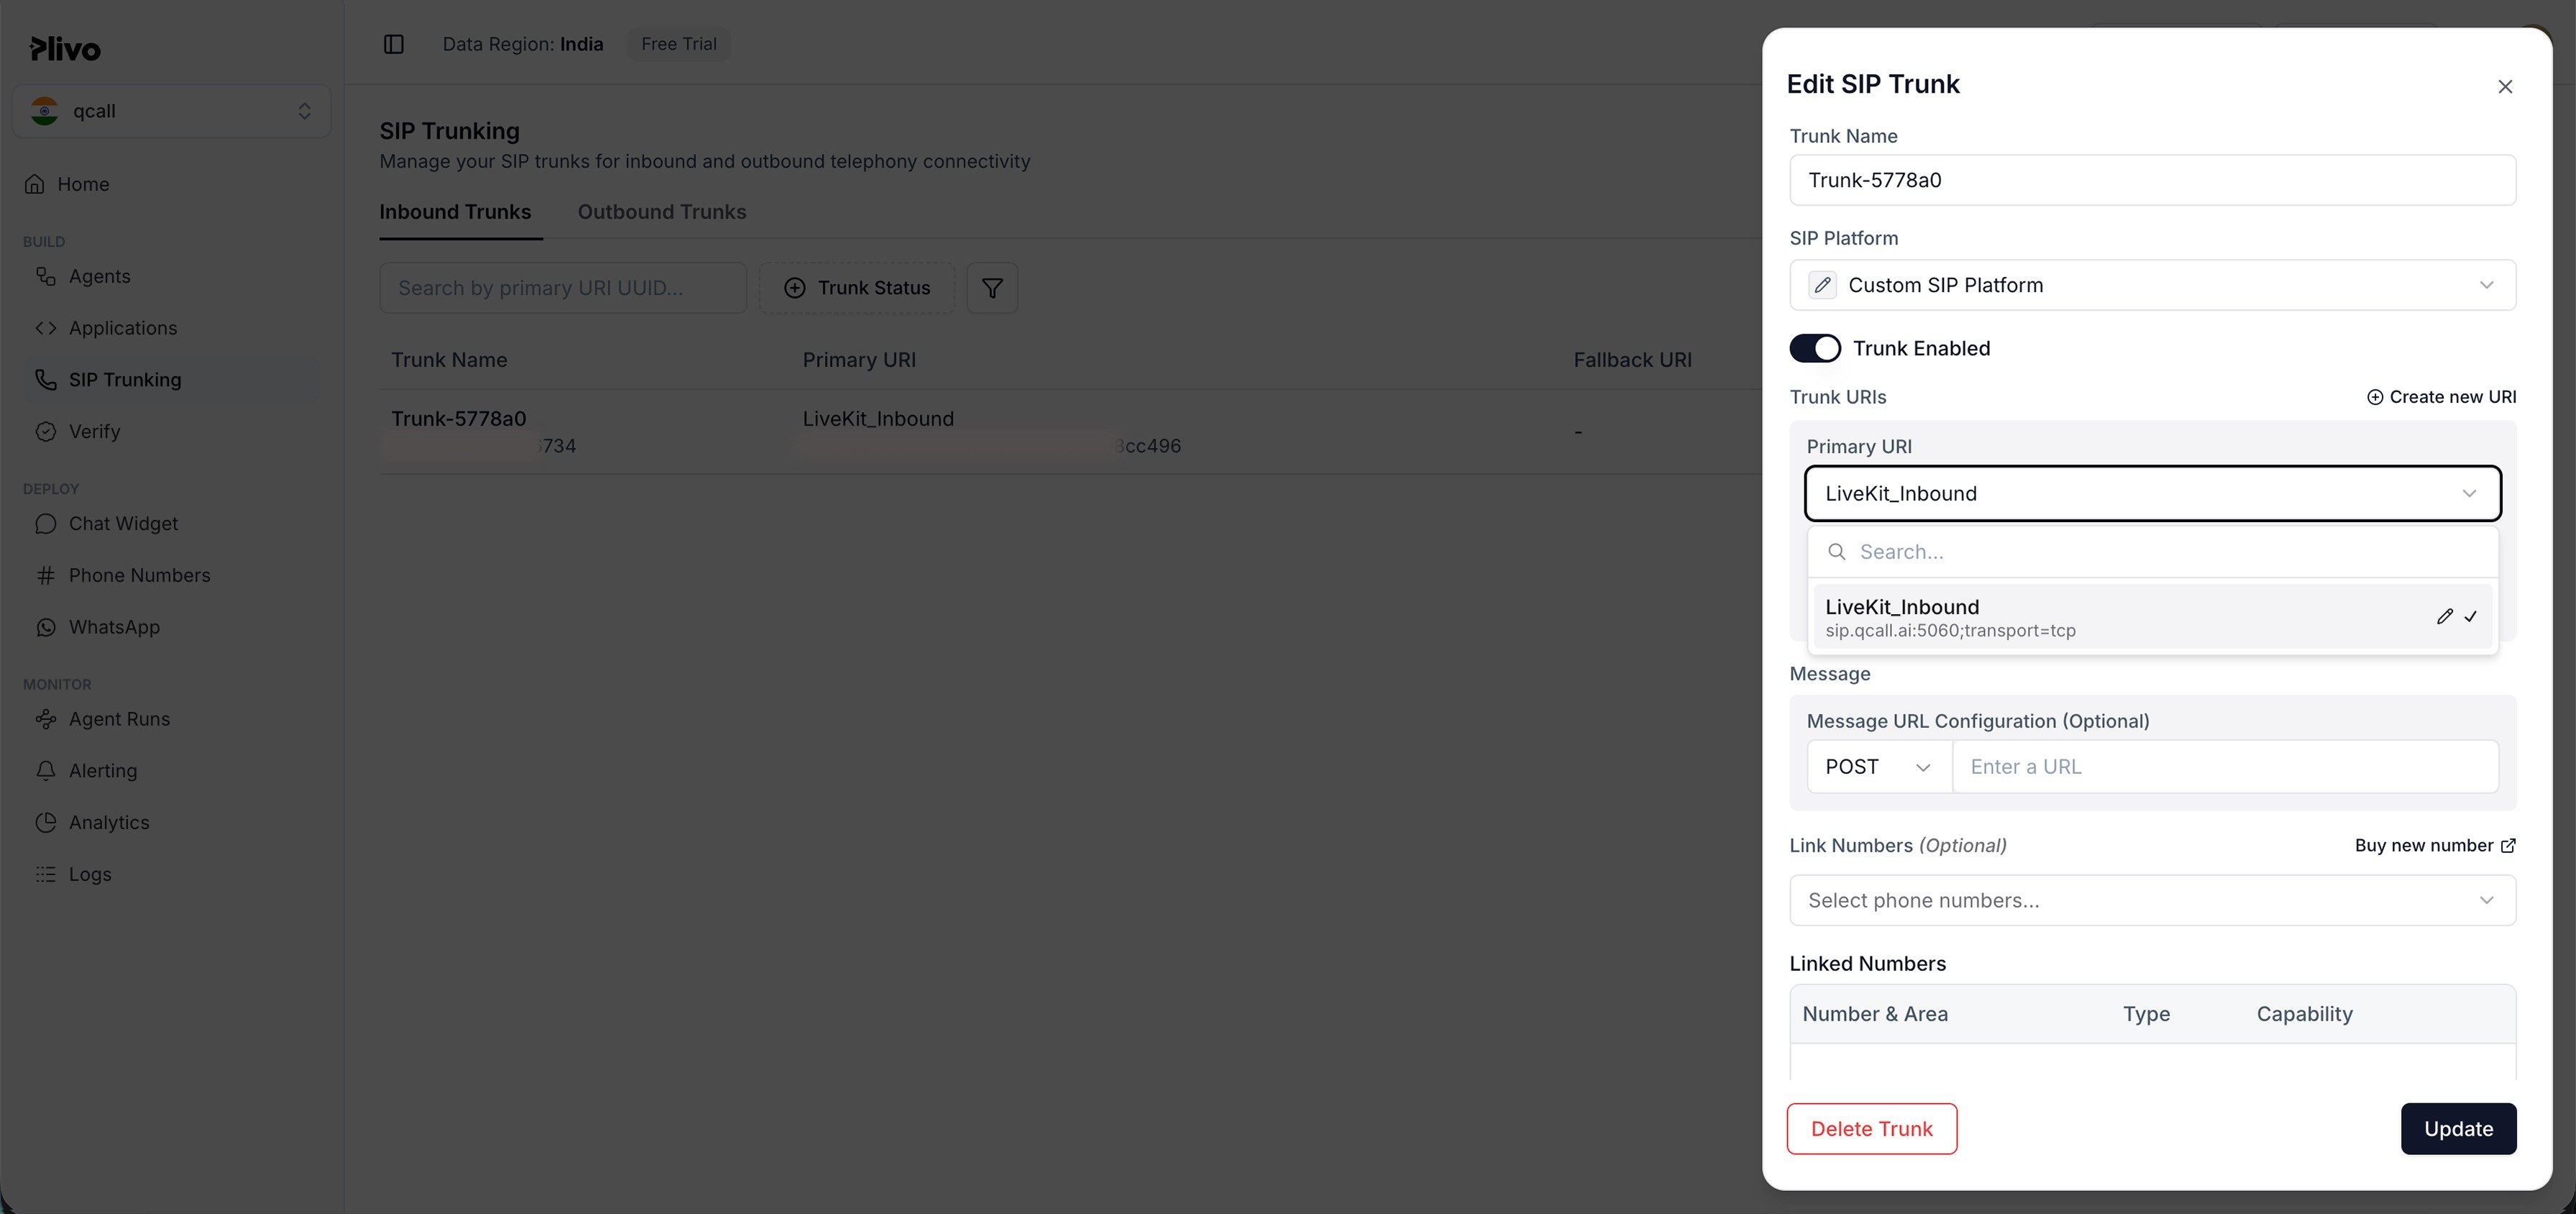
- Set the Primary URI to your QCall SIP URI from Part B:
- Enter it without the
sip:prefix. - Append
;transport=tcp(recommended) — e.g.178.212.35.170:5060;transport=tcp. - For encrypted signaling/media, use
;transport=tlsinstead and enable Secure Trunking.
- Enter it without the
- Confirm the DID from Step 2 is still linked to this inbound trunk.
- Save.
- Outbound: QCall →
21784177241578.zt.plivo.com(your Plivo trunk) → PSTN. - Inbound: Caller → your DID → Plivo →
178.212.35.170:5060(QCall) → AI agent.
Testing
Outbound test- In QCall, assign the new SIP dialer to a campaign or a Playground test call.
- Place a call to your own mobile. It should ring with your Plivo DID as caller ID and the AI agent should speak when you answer.
- From any phone, call your Plivo DID number.
- It should connect to your AI agent (assign an inbound assistant to this dialer/number in QCall first).